Showing posts with label green energy. Show all posts

Sunday, June 17, 2018

Heating element testing


I decided that I would finally test a 10cm length of 36 AWG nichrome wire with a current limited supply of varying voltages.  Since my windmill generates under 1 Amp of electricity I decided to use an LM317 integrated circuit to fix the current at a max of 220mA.  I put an LM317 in a bread board and attached its output to a 10cm length of 36 AWG nichrome wire (from the hair curler heating element).  Below is the circuit diagram for my LM317 set to limit current to 220mA:

Using the LM317 as a current limiter
Need to connect the 3 terminal chip as below:
     pic

To calculate the resistance that you need to limit the current to what you want:
     formula

In an effort to maximize the effectiveness of the heating element I decided to test different thicknesses (or gauges - higher the gauge thinner the wire) of Nichrome wire to see which would work best (produce the most heat with the power produced by the windmill - just under 2 watts). With this in mind I ordered 40 and 38 AWG Nichrome wire from Jacobs Online . They mainly sell Nichrome wire for making foam cutters and igniters for model rockets (the larger scale rockets). They are fairly inexpensive since you can order lengths as short as 10 feet – for $6 I got 10 feet of each of the 2 sizes I mentioned before (if I had wanted 100 feet of each I think it would have only cost me around $12 – better deal but I just don't want all the excess around).

Some basic notes on Nichrome wire:
  • higher gauge (thinner) = higher resistance per unit length and heats up at lower power (less current)
  • coiled wire produces higher temps than straight wire (with the same voltage and current)
More in depth info on nichrome wire take a look at the Wikipedia Page for Nichrome Wire

Resistivity of 1 foot straight Nichrome wire at room temperature:
AWG Ohms
40       70.2
38       42.2
36       27.0

Need some type of temperature resistant insulation between the wire  and the aluminum casing to prevent shorting out the current to the wire (do not want the wire in direct contact with the aluminum since it also conducts electricity). Insulation: Mica sheet, fiber glass fabric (welding supply, car body work with Bondo)

Ni-chrome Wire Calculator
Gives you some ideas of what you need even though the lowest temperature on the calculator is 400 degrees Fahrenheit.

If average wind speed is 15mph – which produces 220mA at about 9volts. That gives us our average power available. Ohms law states V=IR rearranging we get R=V/I:
R = 9v/0.220Amps
R = 40.9 Ohms

So, with the windmill running with a 15mph wind producing 9 volts with 220mA (which is just under 2 wattS – P=9v*0.22A) if we use a length of wire with 40.9 ohms resistance it should use up all the power. Yes, I know its not perfect reasoning since resistance increases with increasing temperature in the wire but I'm just trying to get an idea of what I need before I begin trying things.


Thursday, May 14, 2015

Hackaday Prize

I've liked the Hackaday site and the Hackaday Prize for quite a while.  They are wonderful sources of new ideas and inspiration.

The 2015 competition opened two months ago (when I originally wrote this post) and the focus is on ideas that address important issues effecting lots of people.

 I've been brainstorming ideas for a project for the competition and areas I've focused on are:

Water
  1. Solar purification/desalination
  2. Collection techniques - reclaim from air, rain, etc
  3. Potability measurement device (determine if water is safe to drink)
Diabetes
  1. more efficient bG testing/measurement
  2. bG testing method without strips
  3. bG testing method without using lancet (no finger pricks)
  4. open source/hardware meter that can utilize multiple strip types
Food Allergen  detection/alert to warn of potential hazard (for anaphylactic level allergies)
  1. methods for detecting allergens
  2. protein based allergens
  3. other types
 Smart phone medical lab
  1. what data can we collect?

Tuesday, January 21, 2014

Final (for now) Bird Bath Heater post

After many redesigns of the heating element I have had no success in melting any ice in the birdbath. I have tested the integrity of the newest element that I made, multiple times, as well as the power coming from the windmill and I can say that the windmill is generating the expected power and the heating element seems to be intact (resistance is unchanged from the calculated and initial measured resistance). It seems that I need either a bigger windmill or even higher gauge (thinner) wire than what I have used so far.

The last heating element I tried was a repeat of the last one only I made it much more compact to concentrate the heat:
Heating Element v3
I put it together using:
I wrapped the Nichrome wire around a short section of wire insulation taken from a hair curler (same one I took the original Nichrome wire from) - I wound the wire as close as I could and then coated it with the RTV silicone. (On the left side of the picture is a tube of RTV silicone (Room Temperature Vulcanizing) meaning it sets and cures at room temperature to become resistant to higher temperatures [this one was rated around 300 degree Celsius)
For clarity, a bigger windmill would mean any of the following or a combination of them:
Larger propeller (bigger swept area)
Bigger motor (larger stepper, treadmill motor – just something with a bigger output)
Higher placement (less turbulent winds)

Other things that would possibly increase effectiveness:
*More efficient heating element
  • thinner wire
  • closer spacing of wire in coil (tighter coil)
  • improve heat conduction from coil to body of element
*Add solar to increase power to heater (likely minimal due to decreased solar radiation in winter)

The windmill itself is undamaged and continu
es to function even after the nasty weather that we've had over the last few weeks. So, I can say the basic design works and I will leave it outside to see how it holds up over the rest of the winter.

I will continue to post over this week to catch up (I've been working on some additional projects)

Monday, December 30, 2013

Project Birdbath Heater - Update

I've survived the Holiday's so far so it's time for a progress update.

I've encountered a few additional problems, ones I anticipated might happen, but hoped would not:
  • Frozen bearing mount - I noticed that my windmill blades did not seem to turn very often, at first I didn't think much about it (wind was pretty minimal) but I finally got curious ad checked.  I found that the bearing that allowed the windmill to rotate into the wind was frozen.
  • Vane on back of windmill - vibration due to wind seems to have worked nuts loose, found vane on the ground under the windmill.
  • Fixing and securing bearing mount (adding set screws) caused the wood to split.
Solution to cracked mount - due to trying to secure bearing with set screws - Zip Ties (they've held up for a week now)

Rudder fell off - screws came loose due to vibration - Zip Ties to the rescue again (still holding up)

New heating element tested (v2a) - using 40 AWG Nichrome wire (18.2cm long)

Cut from steel enclosure from dead Nintendo play station power supply

Before folding closed and sealing with epoxy

The v2a element still did not work successfully. Never really got warm enough to melt the ice.

Newer element, v2b, using 40 AWG nichrome wire wrapped around heat resistant wire insulation harvested from hair curler (or hair dyer - I'm not really sure).  18.2cm of wire wrapped around insulated tubing, then coated with RTV (room temperature vulcanizing) silicone, allowed to dry, inserted into aluminum tubing and sealed with more silicone. This element uses the same length and gauge of wire as v2a but is much more compact (concentrating the heat).  Currently waiting for the silicone to dry and will hopefully test in the morning.


Saturday, December 14, 2013

Project Bird Bath Heater - Windmill Mount Re-Design

Due to the results of my initial test I needed to redesign and build a better mount for my little windmill, one  that allows rotation but is strong enough to stay attached to the pole it is secured to.

I'm hoping that a better idea is to use an actual bearing assembly instead of a caster wheel from an old rolling shelf (at least I think that's what I salvaged it from). My local Ace Hardware carries flanged axial bearings that should be ideal for this. My only issues are: 1.) how to mount the bearing and 2.) how to secure the axle that I need to place inside the bearing (ideally the axle should be hollow so I can run the wiring through it and down the inside of the pole). Well, I guess I also 3.) need to secure the the whole assembly to the pole – so 3 issues to take care of.
Flanged Axial Bearing

Looking up pictures of mounts for flanged axial bearings I mainly came up with cast iron fittings. Not real helpful but then I saw a picture of a bearing used with a spring type shock absorber and it gave me an idea -  If I could drill or bore out a hole in acrylic, or some other material, just big enough to fit the body of the bearing with the lip (or flange) on the edge of the hole – then I could secure it with set screws or glue. I decided to prototype using wood and if it works out I could try acrylic or some type of hardwood.

I had some scrap 1”x3” poplar board so I decided to use that. Below is what I came up with. Initially I was going to use just 2 layers – 1 for the bearing and 1 for the conduit. But, thought about it and decided to use 2 layers for the conduit connection (providing about 1 ½” overlap of the conduit pipe. Initially, I am just screwing these layers together with galvanized deck screws after sealing the pieces with paint. If this works I'll try and get something better like teak to make the mount out of and round out the corners to make it look nicer. But my first objective is to actually get this functioning.
 
Wood Layers Drilled out for Bearing and Pole

Stacked Mount

Rt. to Lft.  Locking ring, Bronze Flanged Sleeve Bearing, Flanged Axial Bearing

Bearing assembly

Bearing assembly with windmill body attached

Bearing Mount, Support Pole, Lynch Pin (to secure to mount to pole)

Lynch Pin Inserted

Windmill Mount all together (before painting and wiring)

Yesterday I painted the wood in the hope that it will help protect it from the elements (and allow the mount to last longer so this idea can be fully tested). Today the paint is fully dry so I can begin assembling the whole thing:
  1. First step is to run the wiring down the pole and out to the rectifier board
  2. Glue (epoxy) the axial bearing into the the wooden mount
  3. Place some type of cap over the top of the bearing assembly to prevent water, snow and ice from entering the pole

Below is a picture of how the wiring enters the support pole:

 I finally found a small plastic box for the rectifier board.  I added a plug so that I'd be able to change heating elements easily (just in case I come up with a more efficient configuration)
Hopefully I'll be able to run another live test tomorrow.

Thursday, December 12, 2013

Project Bird Bath Heater - Update

Here are a few pics of the finished rectifier board:
Top

Bottom
I do plan on enclosing it in some type of box to protect it from the elements but first I want everything up and running.

For my rotating mount I decided to use the same thing I used on my prior mini windmill - a small caster wheel.

My first step was to pry of the plastic wheels:
Below is how I need to position it on the body of the windmill:
To attach it to the body I had to fashion 2 aluminum brackets (from a thinner piece of sheet aluminum - scrap I had left over from a previous project).  On the left in the picture below is one of the pieces that I used to shape and cut the brackets.
The final assembly, shown below, not attached to the windmill body.  The caster is inserted into a #4 rubber stopper which I used to attach it to the 3/4" conduit pipe (if you look closely you can see the line on the stopper where it met the top of the pipe) that I am using as the pole for the windmill.  With this arrangement I had to run the wires on the outside of the pole, which I was hoping to avoid.


Now on to the Heating Element

Since I couldn't find an adequate element I had to try and fashion one of my own from the nichrome wire harvested from an old hair curler.  I decided on using a 10cm segment wrapped around the mica like in the hair curler.  I then soldered leads taken from the hair curler (since they are insulated with heat resistant insulation) - to solder to the nichrome wire I needed to use an acid base flux.  Below is the wire wrapped around the mica with leads attached, the other mica above and below, and part of the aluminum case on the left:
For the aluminum case I again used a thin piece of sheet aluminum cut down to size - I designed it to be folded over the nichrome and mica bundle, with the sides wrapped around and the top flap folded over separating the 2 leads.  I rough cut the aluminum piece with a hacksaw and refined the shape with small metal files.
prior to folding edges over

ready for the epoxy
I sealed this shut using Loctite Epoxy Weld and soldered leads from the rectifier board to the element long enough to reach the bird bath.

Initial testing took place on Monday afternoon. After pounding a 3 foot galvanized steel pipe 1 foot into the frozen ground – I placed the windmills pole (10 feet long 3/4" galvanized conduit) into the steel pipe. With the wind blowing I tested the voltage across the heating element – I only saw values in the 10's of millivolts. Thinking something must be shorted I took it down and tested all the connections and all the diodes in the rectifier array. Everything was fine, it was only then that I realized that with such a low resistance almost all the voltage was passing through the element so the potential difference from one side to the other would have to be really low - so nothing was wrong and it was working correctly.  I set the windmill back up and placed the heating element in the bird bath and went back inside planning to check on it in an hour to see if any ice was melted.  When I came back to check on it the pole was up but the windmill was on the ground with its prop broken off the motor.  The high winds literally popped the stopper right out of the top of the pole.

I expected to post a wonderful success story but instead I need to back up, look at my assumptions and climb some additional hurdles to learn a bit more about a few things.
I am finishing up a new improved mount for the windmill and re-gluing the propeller to the stepper and hope to have it back up for testing tomorrow.

Saturday, December 7, 2013

Windmill pictures, as promised

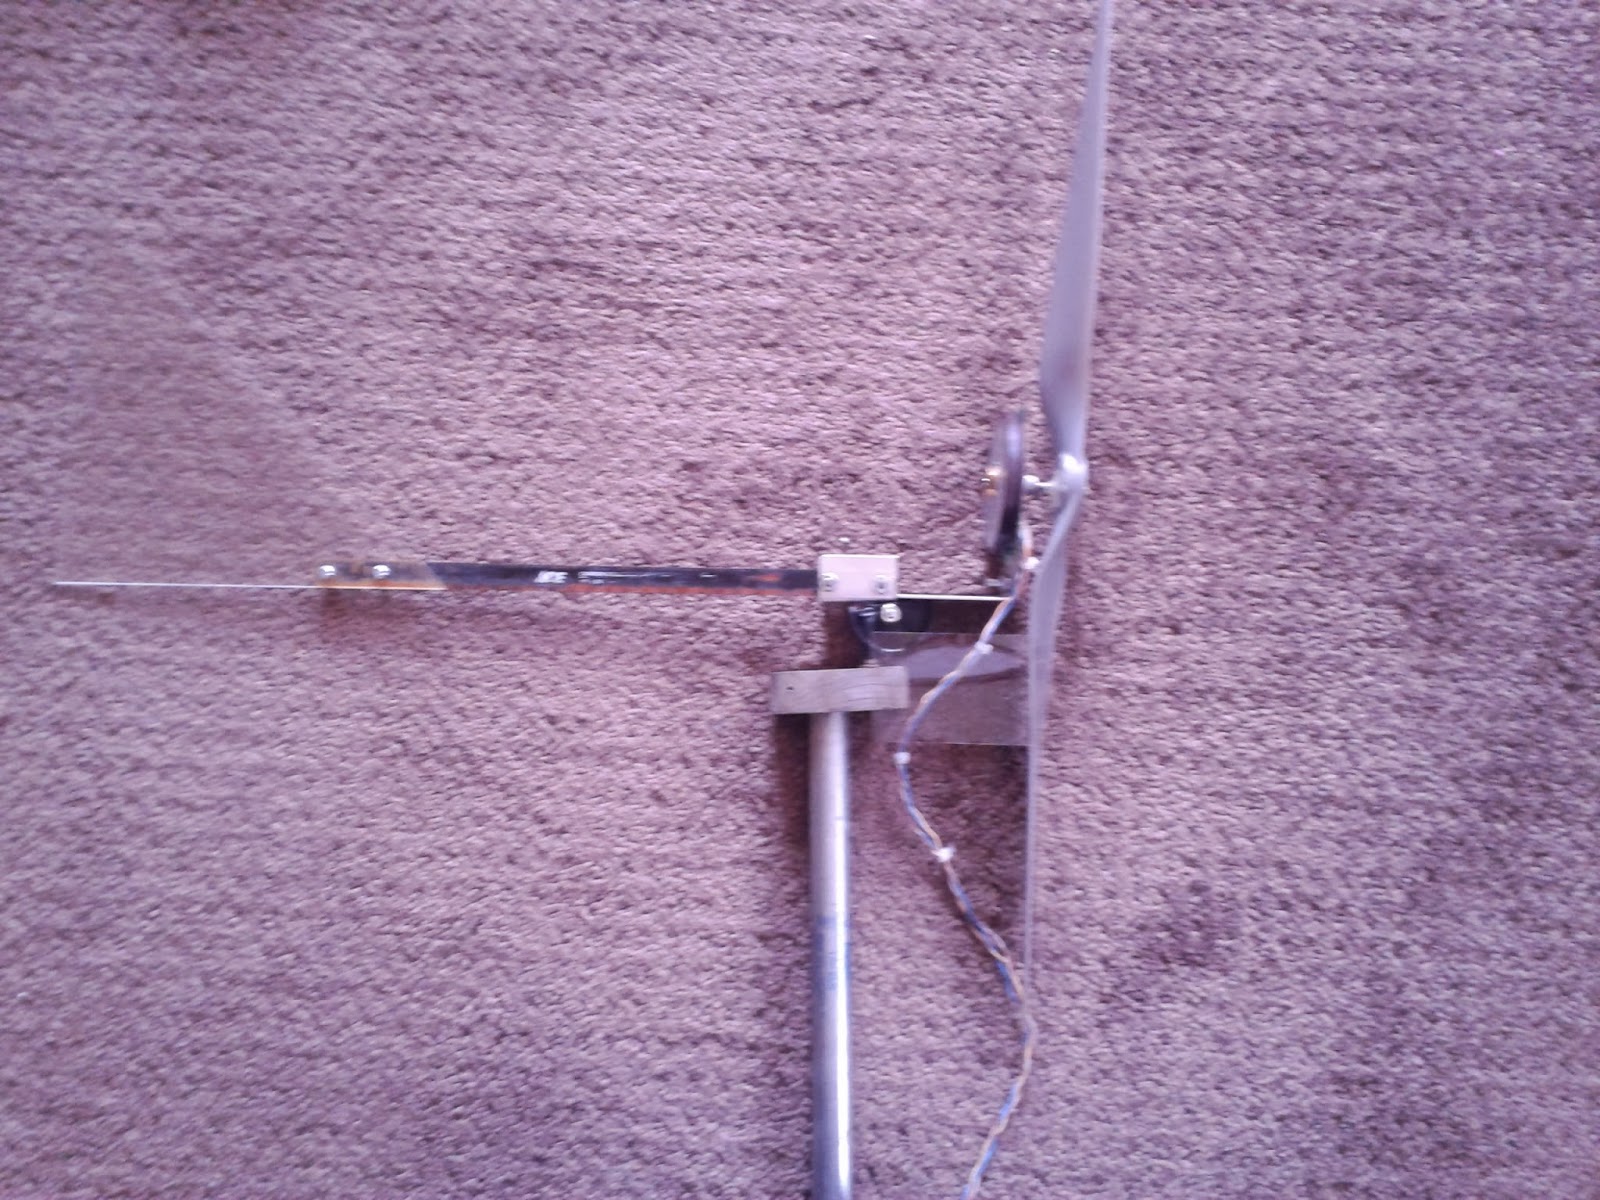
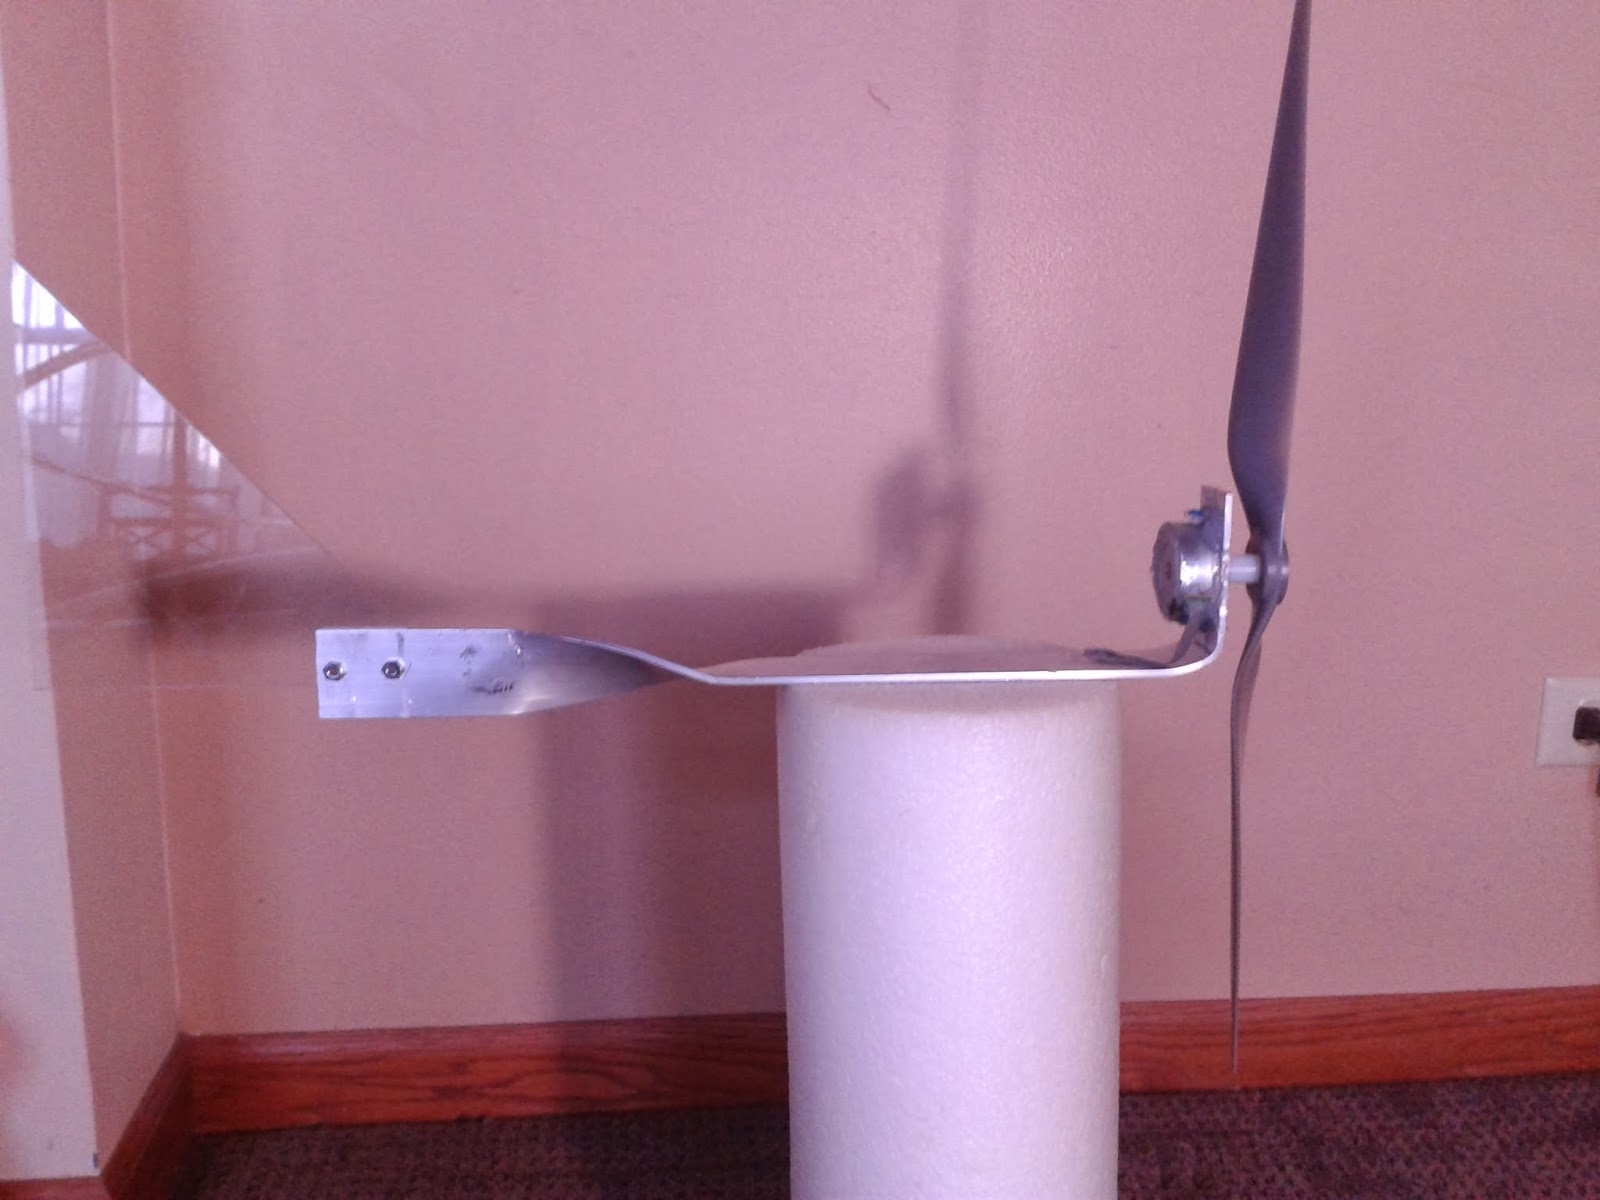
This is what the current windmill generator looks like, without:
  1. Final wiring
  2. Rotating mount (so it can turn to face into the wind)
  3. Pole - to situate it above the ground

The propeller and wind vane were both recycled from my initial mini wind generator that I built over the summer.  The body is made from aluminum, that I originally purchased to fabricate propeller blades - I think it cost around $8 and I only used half the of it. 

The propeller is screwed onto a nylon spacer which is in turn secured to the stepper motor shaft (which has a collar with spokes) using Loctite Plastic Bonder Epoxy (I first tried using 2 set screws to lock the nylon spacer to the spoke wheel and then tried hot glue - that secured it long enough for the tests I ran to determine generator output at 15 mph wind speed. It came off after that).  The back of the stepper motor and the board on the side of it that connects to its power cable I coated in clear latex to protect them from water - preventing it from shorting out the or water getting in and freezing inside the motor and locking up the generator.

Some notes concerning height and placement of a windmill.   Ideally it should be at least 30 feet off of the ground since that height removes it from the level of gusts and places it in the area of more consistent air flow.  In addition,  it is generally best to place it as far as possible from other structures - 1) In case the windmill falls over, don't want it to damage any buildings, 2)Nearby structures will interfere with airflow - this even applies to rooftop windmills.  This does not mean you can't place them in these areas, only that they will be less efficient.

This mini-windmill will be fairly close to structures and not very high (planning to place it about 10 feet off the ground).  I need it fairly close to the birdbath to minimize resistive losses from the wires carrying the power.  So, this won't be as efficient a generator as it could be but I shouldn't really need much power.

Friday, December 6, 2013

Bird Bath 3 - more data and start of Windmill Build

After some basic measurements on the Nic-chrome wire, that I harvested from a hair curler, I found:
  • Wire is 36 AWG (5 mil measured by micrometer)
  • Length - 76cm
  • Resistance 74.2 Ohm for entire length
I did some further measurements to determine resistance related to length of wire as well as current draw per length of wire (with stepper motor spinning at 1630 RPM):


1630 RPM
cmOhmmA
1010244.0
2020180.0
3030145.5
4040124.0
5050108.5
606096.0
706986.0 
Pictures in the morning (some fun camera issues).


Thursday, December 5, 2013

Bird Bath Defroster Update

Continuing the Bird Bath Defroster build after a busy holiday break for Thanksgiving.

My first goal was testing the output of the stepper motor at various speeds with output rectified through 2 bridge rectifiers, since this is how I envisioned setting it up outside.
After thinking about how to go about doing this I remembered that my drill press has speeds listed for different pulley configurations.

Placing the axle of the stepper motor in the chuck of the drill press and securing the motor I was able to run it at different speeds and see what voltage and current it can produce.  I tested it with the output open as well as testing it across the heating element from the coffee maker as a load. Testing the heating element with my Multimeter I found that it's resistance was 16.6 ohms. 

RPM VLoad I (mA) VOpen
760 1.9 112 4.75
1150 2.89 166 7.22
1630 3.83 219.9 10.16
2180 4.91 283.4 14.3
3070 6.18 362.7 21.43

Running the stepper at high speed, and connecting the heating element, I checked to see if it would warm up after a few minutes – no matter the speed I did not feel any warmth from the element. I checked the casing of the coffee maker for specifications and realized that it is rated for 900watts – the stepper couldn't generate even 10% of that at the highest speed I tested. 

I also tested the stepper with blades attached to find out what it could output at 15 mph wind speed. I mounted the motor on a wooden plank and held it out my car window while driving at 15 mph (to simulate 15 mph wind speed). The motor was wired through the rectifiers and attached to my Multimeter.  At 15 mph the motor produced 8-10 volts (no load attached) so from previous measurements I assume that it spins at 1150 – 1630 rpm in a 15 mph wind.

Why 15 mph? Checking out wind speed data for Plainfield, Illinois I found that the average annual wind speed is 16.5 mph, with highest speeds in fall and winter and lowest over the summer months. Also, the speedometer on my car is analog not digital so it's easier to estimate 15 (than 16.5).

From this data it definitely appears that I need a different heating element. Searching around my workbench I was able to find the hair curler that I disassembled previously and after some work with a hacksaw, and a screwdriver serving as a pry bar, I removed the heating element:

The element appears to be Ni-chrome wire wrapped around mica and sandwiched between mica (at least I believe it is mica – it looks like it and I know that it is used as a dielectric in some types of capacitors so it is a good electrical insulator).  My next step with the Ni-Chrome wire will be:
  1. measure its thickness/wire gauge
  2. determine resistance per unit length (ohms per cm or per 10 cm)
  3. minimum current at 9 volts to heat wire
If the current needed to heat the wire is low enough to be met by the stepper then I will proceed to making a heating element by encasing the wire in the mica (to electrically insulate it) and then placing that inside aluminum (to transfer the heat to the water).  I do plan on sealing the aluminum closed with epoxy to water proof the wiring (brazing or welding would likely destroy the Ni-Chrome wire).

I will post tomorrow with updates on results.


Thursday, November 21, 2013

Coffee Maker double hack

Since my daughter Callie really likes to have birds visit our backyard, so she can watch them, figure out what kind each is as well what they like (how to attract even more) I decided to find a way to keep our bird bath from icing over before it really gets and stays cold out here. My objectives are to make it out of parts I have or that I can recycle from old tech, and power it from solar or wind (batteries don't really perform well in freezing temperatures and I really did not want to run an extension cord out to the bird bath).

Solar seemed to be out since the sun is not as bright and the days are getting shorter. Wind seems to be a viable alternative since I learned that stepper motors can be used for generators (I've got a number of stepper motors from older printers that I harvested for parts). 
Something to take note of:
Steppers can generate higher voltage at lower speeds (steppers are generally designed to move slower than other motors and when you use a motor as a generator it will generally only generate the voltage it would run off of when it is spinning at the speed it was designed for - a 12 volt motor designed to rotate at 1000rpm will only generate 12 volts when it is spinning at around 1000rpm). 

I already have a model airplane propeller that I bought earlier this summer (if you want it to face into the wind and spin you need to mount it backwards) and a swivel mount from a small windmill generator I built earlier in the summer as a proof of concept, as well as bridge rectifiers to convert the current generated from AC into DC.  Below is the remains of my test wind mill generator that I built over the summer:


Alternator adapted from old VCR (3 phase motor), Mount made from swivel wheel from a chair, Rectifiers pulled from old electronics.  You might notice the tape in the first picture - a storm blew this over and snapped the connection between the generator and the wind vane so I had to tape it together for the picture..

My only real issue was what to use as a heater. Ideally I needed something water proof that could sit in the bird bath.  My main concerns were:
  1. avoiding electrifying the water (and birds along with it)
  2. overheating the water (cooking the birds) 
I looked up commercial bird bath heaters to get some ideas of how they are designed  .   A small immersion heater would be ideal, I couldn't really find an inexpensive one, or even any designs for making one.

So, I switched gears and decided to find a heating element first and then hopefully be able to figure out a method to insulate it for use in water. I tried finding an old hair dryer thinking I could pull the heating coils out – but I couldn't find one. Next I looked at an old curling iron, I disassembled the handle and could see the heating element but couldn't figure away of getting it out without using a hacksaw to cut down the length.


Finally I settled on an old coffee maker in my basement. I detached the power cords, thermal fuse and water tubing and pulled the heating element out of it rather easily.


At full speed the stepper should generate around 12 volts (it is rated as a 12 volt motor) so I needed the heater to warm up rather than boil water - which it is designed to do at 110 mains voltage.  I decided to test this idea  by attaching a 12 volt battery supply to a the coffee pot heating element to see how hot it gets and to check how much current it draws (to get idea if output of stepper/generator is going to be enough).


Data:
  1. Resistance of element: 16.6 ohms
  2. About 600mA current draw at 12 volts (I=V/R Ohms Law)
  3. Element warms up after about a minute. It doesn't seem to get hot, just warm, which should be enough
I'll post the results of this experiment after I finish the build and the weather is cold enough to test it.  If all is well I'll also post the final build instructions up on Instructables .

Now for the double part of the hack. While talking to my wife last night she told me that she wished that her coffee maker could be hooked up to a timer so she wouldn't have to wait for it to brew (she has a Hamilton Beach Scoop - no timer). It seemed like an interesting challenge to me so I starting to think about how I could do it. 

First, of course, I had to check if someone had already done this (why reinvent the wheel - unless you are trying to improve it) and found no one had.

I knew that setting up a countdown timer to trigger a relay is something that I can do but having an actual clock timer would be a lot nicer and the coffee maker that I harvested the heating element from had a functioning timer that would be perfect for the job.  So, I pulled the circuit boards out and started looking at the parts.  The power supply to the heater and the clock/timer were on one board and the clock/timer was a separate board and they are connected by a 5 pin molex ribbon plug (or polarized wafer plug - not to sure of the proper name).

I'll be posting more on this build later, it is a little more involved and I need to write up the math I used for some of it.